
Most people look back on those actresses of the 1950s, and often feel they should have been born in a different era. Well, a step closer to that is dressing like you are in the 1950's, and a key part of that is makeup.

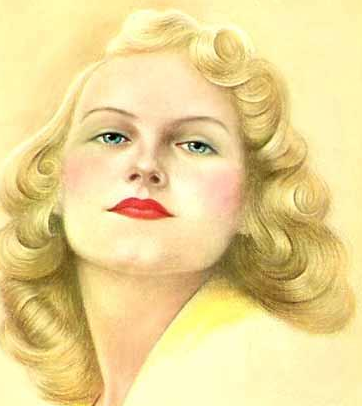
In the above photo, Jane Russel appears to have on the following:
- Red Lipstick
- Foundation
- Powder
- Blush
- Eyebrow pencil
- Eyeshadow
- Eyeliner
- Mascara
Of course, no one is this perfect, and don't expect to be. These actresses had pancake faces of matte makeup- shine really only appeared on their lips. The step by step process would only authentically be explained by your grandmother, or mother, depending on how old you are. So, I concerned myself with what my grandmother wears, and used to wear (shown in photos) on her face.
So, in general, here is what you need and the process of applying it to your face.
- Matte foundation
- Powder, a shade or two lighter than your skin
- A light and medium brown matte eyeshadow
- Optional: a light and medium shade of blue, green, purple or grey
- Rosy coloured blush, a shade which compliments your skin tone
- An eyebrow pencil, some shades darker than your hair colour
- Red lipstick, matte
- Optional: pastels in pink, red orange, peach, fuchsia
- Lip liner, matching lipstick
It's a lot, I know, but compare it to your everyday makeup application.
So, now to apply it.
First off, the foundation. Some used liquid and others used pressed power. Whichever you are used to. This is supposed to be matte, and should cover any imperfections to give you a flawless complexion of an ideal, 'peaches and cream' colour. Some powder, one or two shades lighter, will give a paler look, popular of the 50's.

Next, pencil in the eyebrows. Choose a darker pencil for light hair, but match with darker hair. The eyebrows were usually plucked to get a highly arched brow. They were filled in to become darker and give even more shape to the eye.
The eyes, during the day, were supposed to be natural looking and fresh. However, for a more glamorous look eyeshadow and eyeliner were added to give extra glamour. Brown was a common shadow used, but other colours, like green, purple, blue and grey were also popular. The lighter shade was done all over lid and a bit above the crease; the darker shade applied in the crease. Liquid eyeliner was used as a cat-eye shape, and fake lashes can be applied to the outer corners if wanted. Mascara should be applied if needed as well.
Now the cheeks! To get a rosy flush, take a fluffy blush brush (say that three times fast) and apply it to the apples of your cheeks. For darker shades, apply to cheekbones as it would look out of place on your apples.

Define your lips with a lip pencil that matches your lip shade. Fill in if you want your colour to be long lasting.
The lips should be any matte colour, and applied either directly from the tube or using a lip brush; whichever is more comfortable. Rub lips together (not side to side) to evenly distribute the colour on both sides of your lips. Take a tissue between lips to remove excess, and to prevent lipstick on your teeth, take your finger and put it on your mouth. Pull it out, making an 'o' shape with your mouth. This should remove any lipstick on the inside of your lips which could transfer to your teeth.

And finally, for 'something more', take your eyebrow pencil and add a beauty mark close to your lips or on your upper cheek. Or even better, define an already existing beauty mark on your face. It is never a mole on a 1950s woman; always a beauty mark.
Give a once over in the mirror, making sure nothing is out of place, especially if you are wearing red lips. Red is a bright colour and can appear sloppy if on an unflawless face or applied roughly. Check out the post on 1950s hair to match your makeup.

Hope to hear from your comments!
No comments:
Post a Comment